Friends of Happy Wen!

Showing posts with label copic markers. Show all posts

Monday, May 23, 2016

Guest DT Scrapbook Stamp Society

What an honor to have been chosen as this month's Guest Design Team member as a challenge winner for Scrapbook Stamp Society Challenge Blog where "Have Faith" won. Today they have published a little feature on their My Besties Scrapbook Stamp Society Design Team blog, showcasing this project "Spot of Tea".

Of course, I began with a sweet image from Sherri Baldy, Img927
and colored her up to match Sherri's "Create With Sherri Baldy Designer Papers - A Spot of Tea". I also made a little corner bookmark to accompany my card.

I don't know about you, but I usually choose my image to color, then choose my paper, then color my image in complementing colors to my paper using my copics. The below photo shows the step-by-step Copic recipe. 

This project was no exception, all colored up and adorned with diecuts using my sizzix and LaLa Land dies and my cuttlebug. I hand cut the teapot from one of the papers in Sherri's pack, and added some complimentary ribbon
Until next time, I wish you Tea-riffic Day!


Friday, April 15, 2016

Thanks a "Melon"

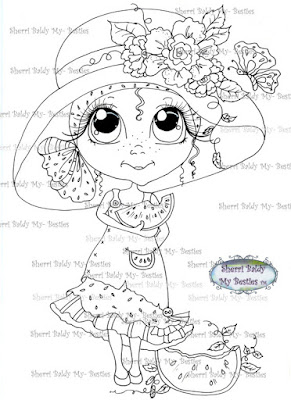
The image of Sherri Baldy's img622 Watermelon Bestie digital stamp was just too cute not to turn into a Thanks a million Melon thank you card. I loved the image so much, I decided to make some paper to go with it.

I colored up the image with my copics, used my cuttlebug to cut my flowers and embellishments, added some bling from Bo Bunny, chalked the edges of my die cuts and overall had a really fun time with my card.
Copic Recipe for this card:
Skin-E0000, 000, 00, 11, 51, RV000, R0000, R21
Watermelons, underskirt, head scarf, butterfly- R21, 29, YG61, 63, 67
Dress/hat-E42, 43, 44 
Flowers/leaves/eyes-Y00, 17, 35, YR18, G82, 85, V12, 15
Shading/ground-W00, 1, 4, B0000

I am also very honored to have been invited to be the Guest DT member for the month of April over at My Besties Deutschland Challenge Blog. I invite you all to join in the fun challenges - stop by for a visit and see what the design team has come up with this month of April - the challenge is Anything Goes.

I hope you have enjoyed this post about my "Thanks a million Melon" thank you card. 
Have a GREAT week!


Sunday, April 3, 2016

Say a little prayer

I found the perfect image from Sherri Baldy, img871 Say A Little Prayer Girl from Sherri's My Bestie Series.
I colored her up with my copics using a different combination for her skin color - I love how it turned out. 
I also did a fancy fold for this card. As a special gift for this card, I made a little corner bookmark for the recipient to mark her scriptures, which she reads daily. I of course used my cuttlebug for my die cuts and some dotty, wordy and stripe papers. The lovely dotted organza ribbon bow holds the card shut, easily lifting the right side of the bow to open the card, revealing the corner bookmark.


Until next time, remember to play and craft daily!


Sunday, March 13, 2016

Digital cardmaking

Digital cardmaking... Since hubs and I are living the full-time RV lifestyle (totally awesome!), I've had to pare down my supplies and go digital as much as possible. So with many yard sales and giving up my beloved diecutting machines, I not only needed to find cute images to color with my Copic markers, but the need to find printable paper and elements has become a necessity if I want to continue one of my favorite hobbies - cardmaking. When searching Google and Pinterest for my necessities, I was overwhelmed with the selection. I did keep my little HP 385 photo printer, enabling me to print 4x6 sizes - PERFECT for my needs.

Without further ado, let's chat about the greeting card I created today, shall we?!?

The ding-dang-darling image is img831 from Sherri Baldy just one of many in her My Besties series.
I knew I wanted to find some papers and embellishment elements with the sewing theme and I so love all things vintage and shabby chic; this awesome set fit the bill 100%!  Vintage Sewing printable papers from issue 147  free from PaperCraft Inspirations Magazine

Matching my Copic Marker colors to my paper - the image was so much fun to color!
Copic Recipe:
Skin - RV0000, 000, 00, E0000, 000
Hair - E41, 42, 43, 44
Shirt/buttons/thread (pink) - RV00, 13, 21
Pants/button/thread (green) - BG10, 13, 15, 23
Buttons/thread (peachy) - R000, 13, 20, 32
Buttons/thread (blue) - B0000, 00, 02, 04
Needle - C00, 02

I laid out my design, picked out my silk ribbon, using a circle punch, my Martha Stewart corner punch with the "sewing" holes to use on my inside insert corners, and used a pushpin and my tiny mouse pad to "sew" the edge of my image and then distressed it a bit with some small tears and edge rolling. I do have a pair of very sharp small scissors to cut out the elements - you could also use an X-Acto knife.


And here is my completed card - "Sew Glad We're Friends!"

Thanks for stopping by - while you're here don't forget to follow my blog and even securely sign up for emails of my posts :) 

Have a spectacular "Sew Glad We're Friends" kinda Day!


Friday, March 4, 2016

Bestie Tales

I saw the cutest image from Sherri Baldy Img697 that I just HAD to have. I knew immediately what I wanted to do with it, so I gathered my supplies and set to work.

Knowing I wanted to emulate a book with the front of my card, I found this great YouTube tutorial from Christina Griffiths-Faux Book Card. I also knew I wanted to make a corner bookmark and followed this tutorial from Jenny at Stamping Moments

I also love to 3d images on my card fronts and have followed the wonderful tutorial from

Adding my Tim Holtz weathered clock die cut, weathering it a bit with Tim's Distress Ink-black soot. The project required some fun stash diving for paper, buttons, ribbons, brads and a clock charm; all of which helped me pull it all together. I wrote a little "book sentiment" as the insert for my intended bestie recipient, which I think she'll get a kick out of.


Of course I colored the images with my beloved copics and added some Ranger liquid pearls and a few dabs of Zig's Wink of Stella.
Copic Recipe:
Skin - R0000, 000, 01, 20
Hair - C00, 2, 4, 6, 8
Pants/Bow - R81, 83, 85

Thanks for stopping by!


Monday, July 9, 2012

Prima Ballarina, Brooklyn!

It's time for my DT project for Seems A Little Sketchy, Sketch 17! This time we are sponsored by AiFactory and I have chosen Ella the Ballerina. Sketch 17 is just perfect for my project!
This sweet little image just grabbed me and pulled me in so much, that I chose to use her six times!
My precious 4 year-old granddaughter, Brooklyn, has her first ballet recital this weekend and this card is perfect for the occasion. I wanted to simulate Brooklyn as the Prima Ballerina with her ballet troupe, all colored up with Copic markers.
I was chatting with my dear friend KathyCan and discussed the project with her, adding that I wanted to make it appear as a stage when you open the card. Well... Kathy had done a stage pop-up card back in November for her daughter, Allison's, birthday. Allison is a big Alice in Wonderland fan, so Kathy ran with that theme for her card - you must check out Kathy's wonderful project here. She turned me onto a fabulous tutorial by Kim (Paper Punch Addiction). Kim's tutorial worked perfectly for this project to put Brooklyn on stage in the spotlight!
Kathy sent me a birthday box full of My Mind's Eye 6x6 pads, and "indie chic" is perfect for Brooky's card. Used my new Memory Box "Elegant Scrollwork" to simulate "motion", which I found at Oozak. Wanted to give a feel for stage lighting, so used buttons, pearls and black tulle for the job on the card front. Inside wanted to use the star jewels/rhinestones, and the DP worked great to simulate the stage curtain valance and stage lighting along the bottom of the stage. I did add more black tulle for the stage curtains. Just added the black tulle tie a belly band to keep the card closed for presentation to Brooklyn. She is going to get the biggest kick out of this one!
Join us at Seems A Little Sketchy for sketch #17, enter the challenge and show us what you created!!!!
Love,
Wendy


Monday, June 25, 2012

Happy Birthday, Peggy!

I'm having such a great time being on the Seems A Little Sketchy Design Team. This project showcases Sketch #16, sponsored by Whoopsi Daisy.
The digi image is one of the fairies from Sheet 243 at Whoopsi Daisy - she is soooo cute! Decided to try my hand at "no black lines" with a digi. I plodded through on my own in PhotoShop (guess it would have been easier had i searched for a tutorial ;) With a wee bit of struggling, finally figured it out - and very much enjoyed the outcome; colored up with Copics.
The DP are from Prima's "songbird collection" 6x6 paper stack, which I found at Oozak (love Oozak - the most awesome customer service!). Used Sizzix oval dies, Martha Stewart butterfly trio punch and her butterfly cut/emboss punch, along with a new butterfly punch by Tonic, found on Blitsy. The fairy pewter charm I've had for eons, found on e-bay. Also used Fiskars flower punch, adding Glossy Accents to some of the butterflies and flowers, along with the little envies. The pearls are Kaiser "bliss".
Chalked the edges of the DP and large butterflies, added the lace trim and even braided three colors of floss for added dimension to the trim. Added a lot of Scotch 3m foam tape for lots of dimension of the layers. The sentiment actually has 3 layers of foam tape (I wish I could give credit to the sentiment artist-but no label on the file except for "fairy kisses star").
And... yuppers... it's an easel!
Thanks for popping by today.
Be sure to head on over to Seems A Little Sketchy to check out my teamies projects and join in the fun with Sketch #16!
Love,
Wendy
Challenges: Craft Your Passion-things with wings; Always Crafting-fairies; Paper Makeup Stamps-AG; Fashionista challenge #4-things with wings; Incy Wincy Designs Challenge-AG; Love to Create Challenge-AG; OLLCB-mystical magic; Paper Playtime-sentiment; Tammy's Scrapin Corner-AG/AA; Whoopsi Daisy-wings; Dream Valley Challenges-wings; Sentimental Sundays-cute and girly; Sketchy colors-green/orange/white; The Crafty Pad-more than 1 fold; 2 sisters challenge blog-AG; Allsorts-dies; Challenge up you life-no lines

Just For You!

Here is my second project for Sketch #16 as a design team member at Seems A Little Sketchy. I love how Jenn sketches - each one is unique and very fun to interpret.
This card showcases our sponsor Whoopsi Daisy. The image I chose is on Sheet 333. She was very fun to color up with Copics - still need more practice with fabric folds - this image is a great one for that technique. This card goes out to a special friend for her birthday.
The DP is Bo Bunny Alora Collection and an old stash B/W check from Making Memories. I love butterflies and flowers! The butterflies are Marianne Designs and the flowers are from Sweet n Sassy, and the Fancy Label from Sizzix, all cut with my favorite tool - my cuttlebug. The black rhinestones are from Queen & Co. All three ribbons are from my LSS, and the bow made with the mini Bowdabra.
My dear friend, KathyCan, cut/embossed the mat used on the front of the card and the sentiment mat on the inside, and sent me a stack of them - thank you so much, My Friend!
Come on over to Seems A Little Sketchy and get in on the fun, fun, fun with Sketch #16!
Thanks for stopping by today!
Love,
Wendy

Monday, June 11, 2012

Seems A Little Sketchy #15 - Congratulations

YAY! This is my first DT project for the awesome challenge blog "Seems A Little Sketchy". You know how I'm all into sketches, so to be chosen for the Seems A Little Sketchy design team is a great honor!
This is sketch #15 and was way fun for my project showcasing our wonderful sponsor Digi Doodle Shop image "Jr. Bride & Groom".
 As some of you know who follow my blog, my husband is a certified minister and I am a photographer. Together we make the perfect pair, especially for weddings! We were honored to attend to the Azam's in May, so this card will go to them, along with their flash drive with their wedding portraits.
I am embarrassed to say I cannot remember who did the wonderful technique that I CASE'D with the tulle in the Spellbinder's lacey oval and large oval cutout, placing the image on the inside of the card, but I sure do love the look - especially for a wedding card.
 The papers are from my hoarded stash of foof-a-la, along with Bazzil and Neenah CS. The pearls are double strung and perfect for a border, and twice useful when cut apart as singles. Also used my Memory Box "meadow leaf" die. The paper roses are from Paper Mart
Come on over to Seems A Little Sketchy and join us in our Sketch #15 Challenge, sponsored by Digi Doodle Shop!
Love,
Wendy
Challenges: The Ribbon Girl Blog-lace/ribbon; Just Some Lines-black/white; Speedy and Friends-B/W w/splash of color; Just Add Ink-pearls; 4 Crafty Chicks-monochromatic; CropStop-monochromatic; Paper Crafting journey-color it up; Oozak-two papers/embellies; Really Reasonable Ribbon-flowers/ribbon; Cooking it up with Katie-celebrate with ribbon and a die cut; Crafting for all Seasons-many layers; Crafty Creations Challenge-wedding/anniversary; Crafty Sentiments-white on white; Digital Tuesday Challenge-AG; Flourishes/Timeless Tuesday-wedding; Papertake Weekly-AG

Tuesday, May 8, 2012

Have a Yummy Birthday!

So I've had six personal best days of my life so far! The day Isaac was born was one of them. Isaac and his wife (Kath) live in Nashville and are both history professors (Isaac-British Studies; Kath-American History) - their birthdays are one week apart and since Isaac is off to England on the 15th for six weeks where he will have an on-campus interview for a tenured position at Warwick University (wooooohooooie) while there, I'm sending off both cards today so they can have them before he goes "across the pond".
I chose this sweet image from Sassy Cheryl's Digis "Sneaky Bear Birthday Cupcake" which you can now find in her $2 bin (hurry, these will retire this month!). I don't do very many "masculine" cards, so this was a bit out of my box.
Followed the PTI anniversary sketch #3 and thought the "bunting" was perfect for this card. Used the cuttlebug to emboss the dots, my star punch to make the "chips" distress on the bunting, sewed the floss through, chalked the edges and used my trusty fine point sharpie to faux sew.
The DPs are BasicGrey and MME, which I thought really complimented each other. The front calendar is from Cindy Close and just put the number 18 for the date, as that is the special day!
The inside of the card on the left has a diagonal pocket for the gift card, and the inside sentiment on the right is from Tracey Brossart - I love this sentiment and Tracey is so clever and amazingly creative!
Bazzil buttons and DMC floss are my main embellies for this card - sometimes i forget about my hoarded buttons, but had fun adding them to this creation. Used my Spellbinders to cut and emboss my image, and colored it all up with my copics.
Thanks so much for stopping by!
Love,
Wendy
Challenges: Simon Says Stamp Challenge-birthday; Sassy Chery's Challenge Blog-stitching; Cards and More Challenge-party; Craft-room Challenge-emboss; Creative Craft Challenge-AG; Papertake Weekly Challenge-cute; Always Crafting Creative Monday-AG; Incy Wincy Designs-spots/dots; Ooh La La Creations-manly; Tammy's Scrapin Corner-dies/punches; Catered Crop-"B"=birthday, bear, buttons, bunting; Come and get it challenge-let's hear it for the boys; Great Impressions Challenge-AG; That Craft Place Challenge-one for the boys; {Cupcake Insiprations}-#159; A and T Challenge Blog-AG; Mad for Markers monthly challenge-masculine colors; Sparkles Monthly Challenge- *Men*; 2 Sisters Challenge Blog-#90 AG; BasicGrey Challenge-1,2,3 recipe; Catch the Bug Challenge-AG; One Stop Craft Challenge-celebrations; Sweet Stampin' Challenge-four legged friends; Cardmadfairy's Digi Challenge-add a number; Crafty Ann's Challenge-stitching; Inspire me Fridays-AG; Stampin' for the weekend-4+layers/blog hop;